
If you’re looking to sharpen your web experience—be it faster page loading, enhanced privacy, or tighter parental controls—changing your DNS server in Windows is a simple tweak with powerful results. Here’s a quick guide to help you unlock the benefits by switching from your ISP’s default DNS to a provider like OpenDNS, Google DNS, or Cloudflare
⚙️ Step-by-Step: Changing Your DNS Settings in Windows 11
- Open Network Settings
- Right-click the network icon in your system tray.
- Select “Network & Internet settings.”
- Access Adapter Settings
- Scroll down and click “Advanced network settings.”
- Under “Related settings,” choose “More network adapter options.”
- Right-click your active network (Wi-Fi or Ethernet) and choose “Properties.”
- Modify DNS Settings
- Double-click on “Internet Protocol Version 4 (TCP/IPv4).”
- Choose “Use the following DNS server addresses.”
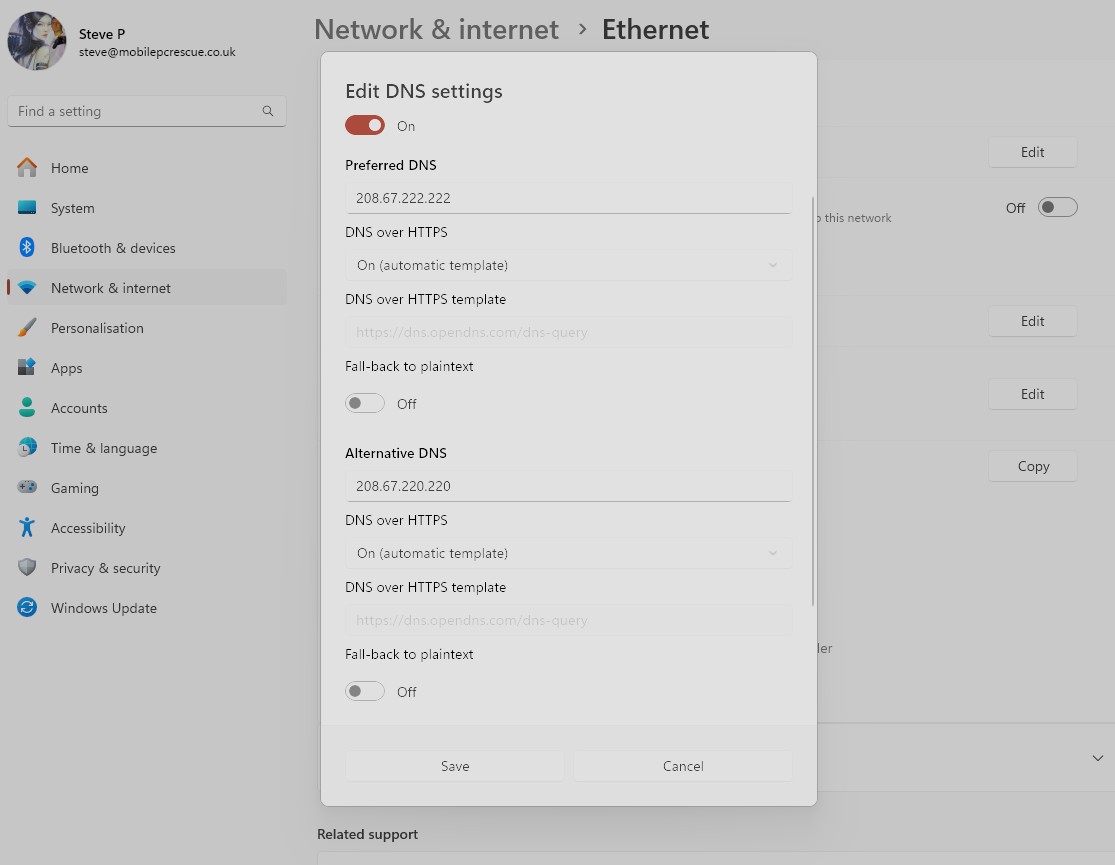
- Enter your preferred DNS:
- OpenDNS:
208.67.222.222and208.67.220.220 - Google DNS:
8.8.8.8and8.8.4.4 - Cloudflare DNS:
1.1.1.1and1.0.0.1
- Apply & Restart – good luck 🙂
I personally use Open DNS.
Discover more from Mobile PC Rescue
Subscribe to get the latest posts sent to your email.