As many of you know I love my photography. Over the past 15 years I have created many Time Lapse videos, and in the old days we had to do this by taking hundreds or thousands of images and then stitch them together using various programs. Nowadays, the cameras do all this challenging work for us, and we get much better results without having thousands of images to look through. It is so much nicer doing them with the new GoPro cameras and even smart phones. I have 2 gadgets that help, one is called Turns Pro which can rotate the camera in various degrees over a set amount of time, and the other is a DJI Osmo which is a gimbal on a stick. I bought my partner the DJI Pocket 2 which is also great at moving timelapses.
As we have progressed, a lot of the older software has been left by the kerb and no longer works in modern Windows 10. I managed to find a version of Microsoft Movie Maker which will install, this is the first program to use as it allows us to stitch all the photos together for further editing.
Please read the update below before proceeding with these steps, depending on the quality you want, that will affect which steps you need to follow 🙂
Once you have installed Microsoft Movie Maker (MMM), go to File & Settings and turn this off, otherwise you’ll get the filename on every frame.
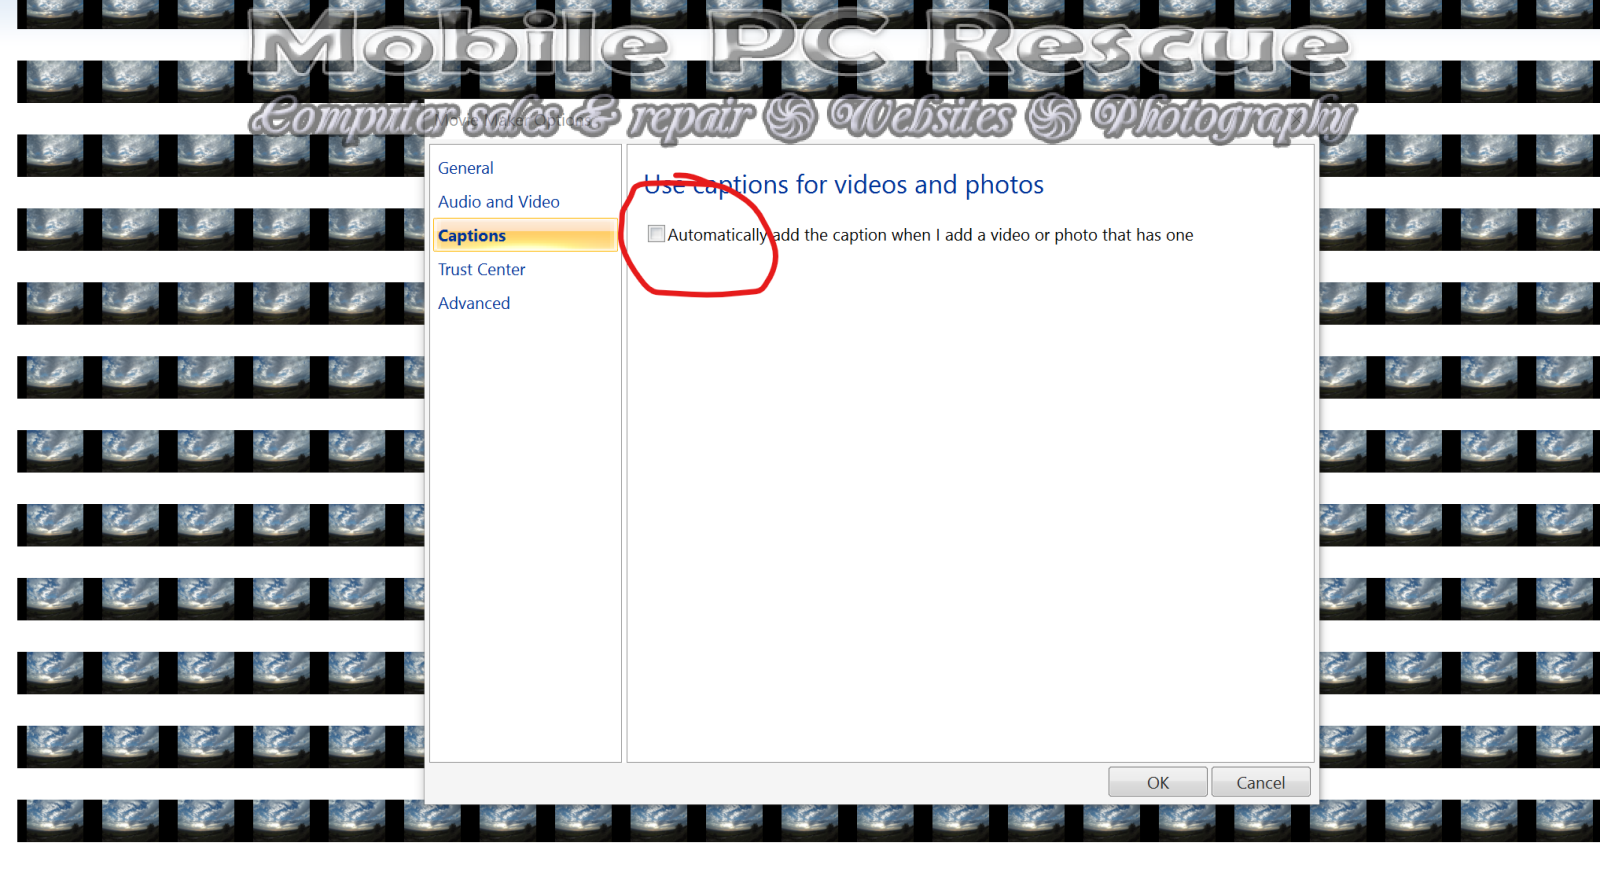
Press CTRL & A or manually go to SELECT ALL.
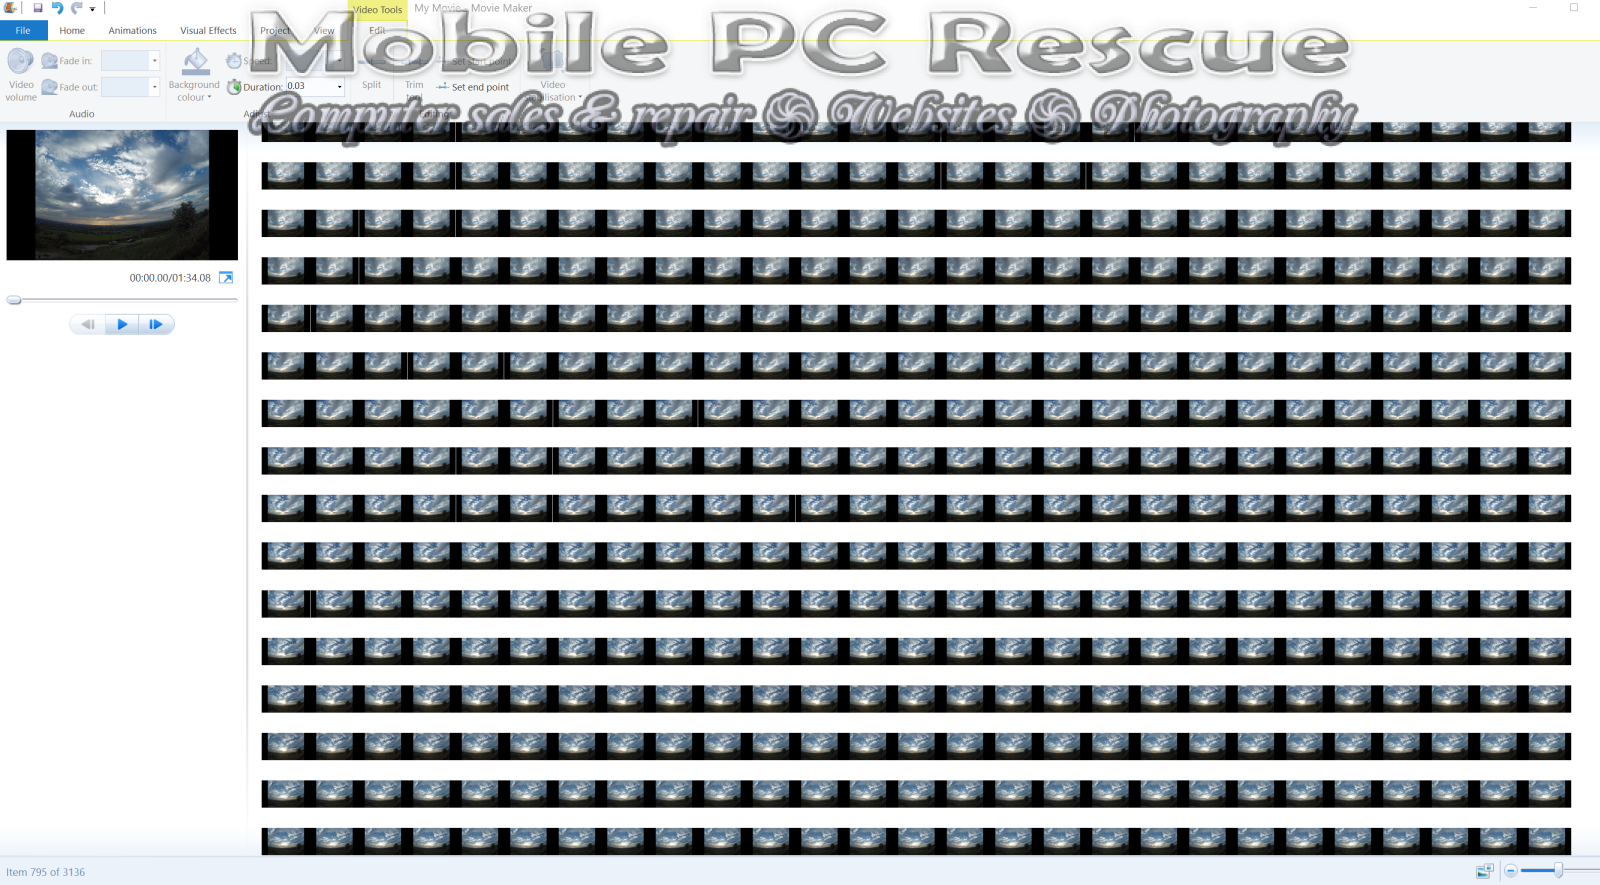
Go to EDIT and put the duration at 0.03 (That’s the lowest number possible), so it plays one photo every 1/3rd of a second.
It should now look like this:
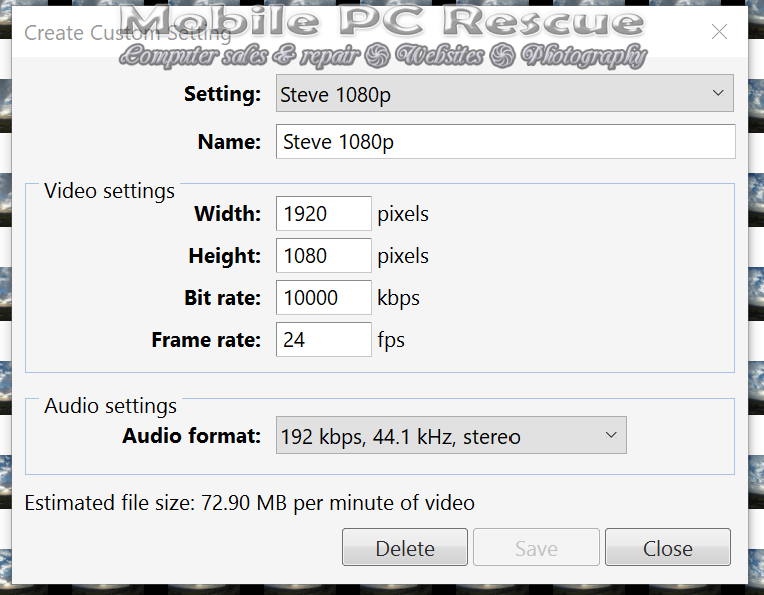
I’ve made a custom profile that outputs at 1920 x 1080 with a bit rate of 10,000kbps @ 24FPS which is the same as most movies you watch.
If you want to export them at full frame 16:9 with no borders, I’d strongly suggest doing this after in another program as newer programs give much better resolutions when clipping. I will normally use Filmora again bit export in 4k so there is zero quality loss form the crop, plus they stream better on YouTube etc 🙂
This is how my video looks today, this is made from 3,136 single JPG files, I have yet to edit this in Filmora, so this is exactly how MMM has output the file for me, which is perfect for my requirements.
The original JPG’s took up 6.4 Gb and this video is only 112Mb, so it’s a massive difference in terms of storage required, plus I’s never really look at the images, but I do love to play the videos 🙂 Before I finalise this, I might try with higher quality files running at 20,000 & 30,000Kbps just to see how much of a difference (IF ANY) I can see.
If this helps you in any way, please hit the like and drop a comment, thank you.
I am updating this today with a much better program, the output is much higher quality, and it’s very simple to do.
We need to download 2 programs:
- VirtualDub – Get the x64 version for Windows 10 if your system supports it. The program does not need to be installed so extract it to C:\Utilities for example.
VirtualDub download (at SourceForge) – virtualdub.org - K-Lite MEGA Codec Pack – we need the MEAG version as we need the transcoder plugins for VirtualDub so we can encode with h264. Just ensure to rad the installers. Always make a Restore Point before installing the Codec pack just incase anything messes up.
Download K-Lite Codec Pack Mega (codecguide.com)
Once you have these set up open up VirtualDub.
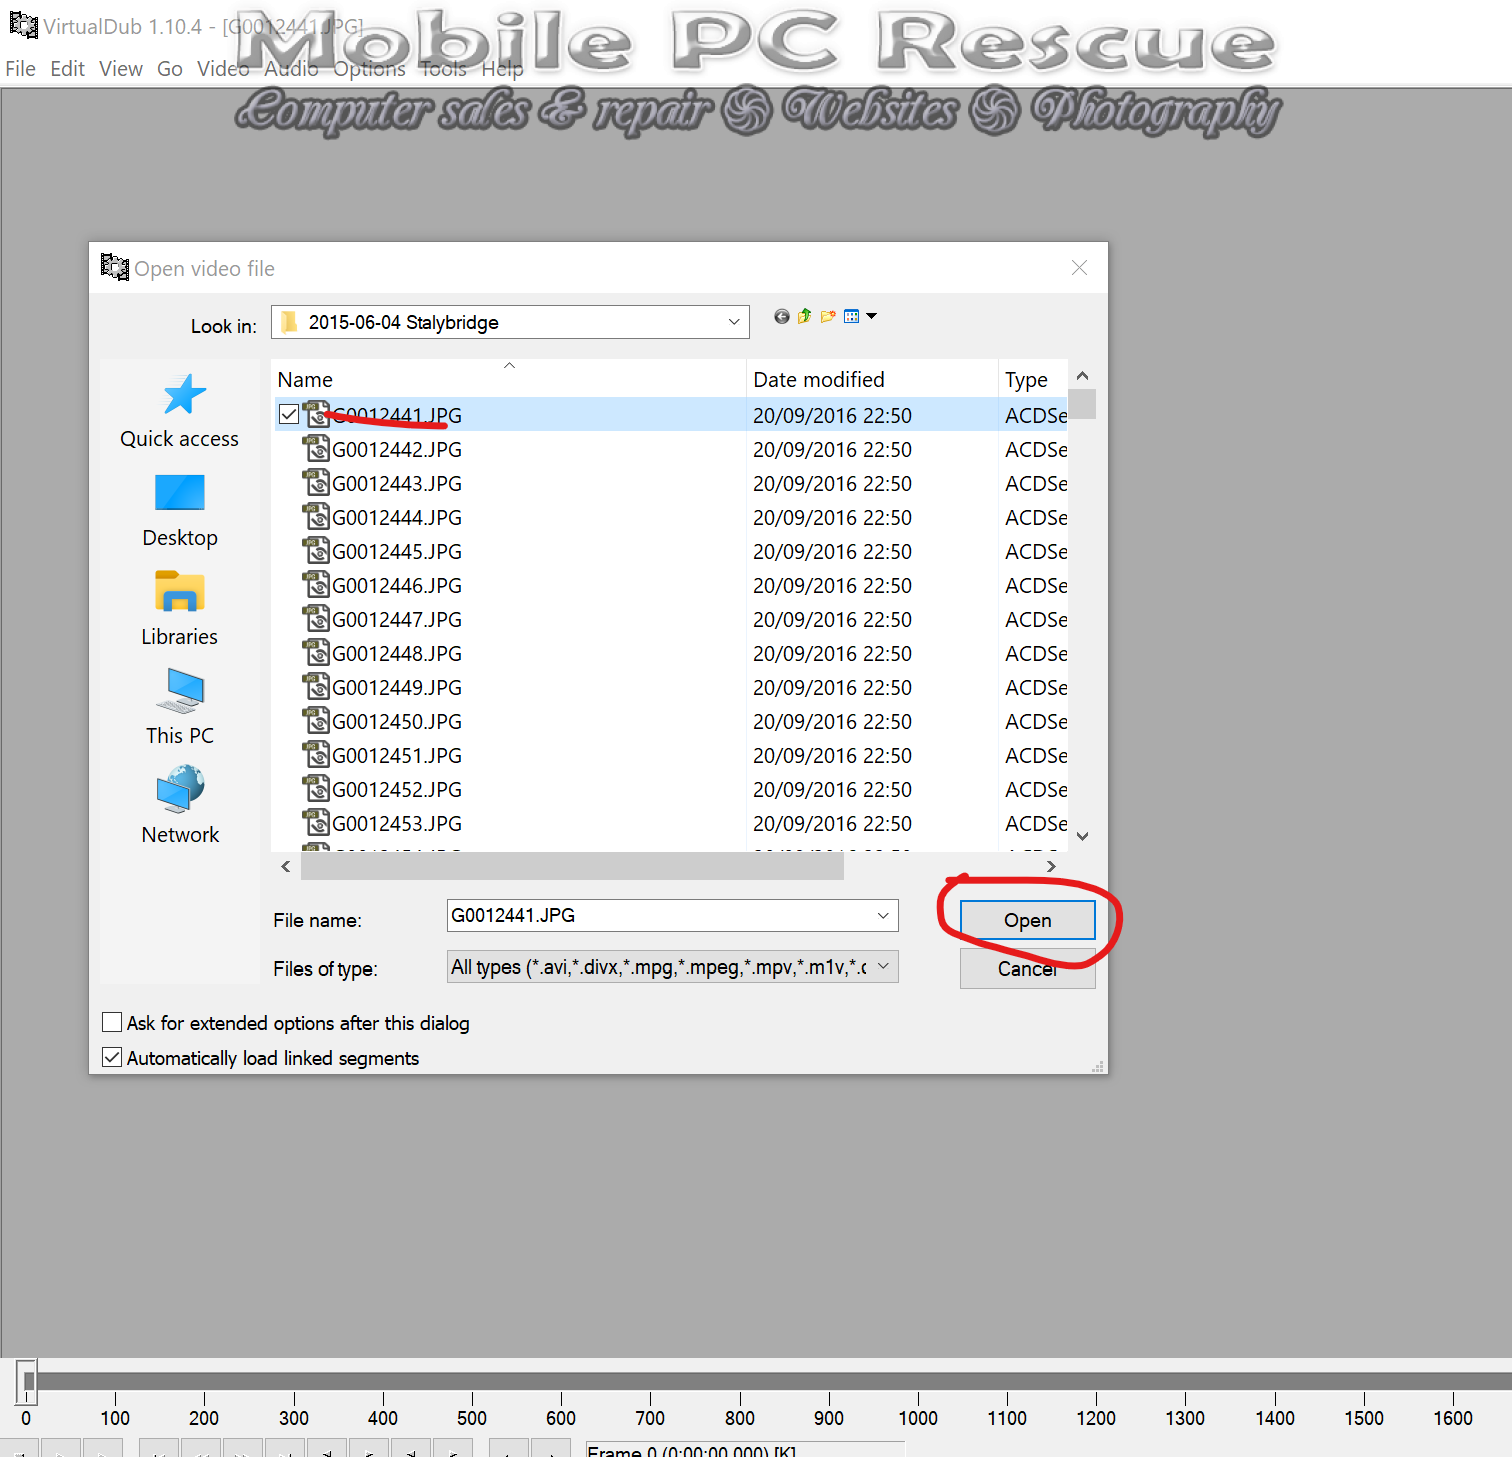
Click File / Open Video and Browse to your folder of images and just select the first one and click OPEN.
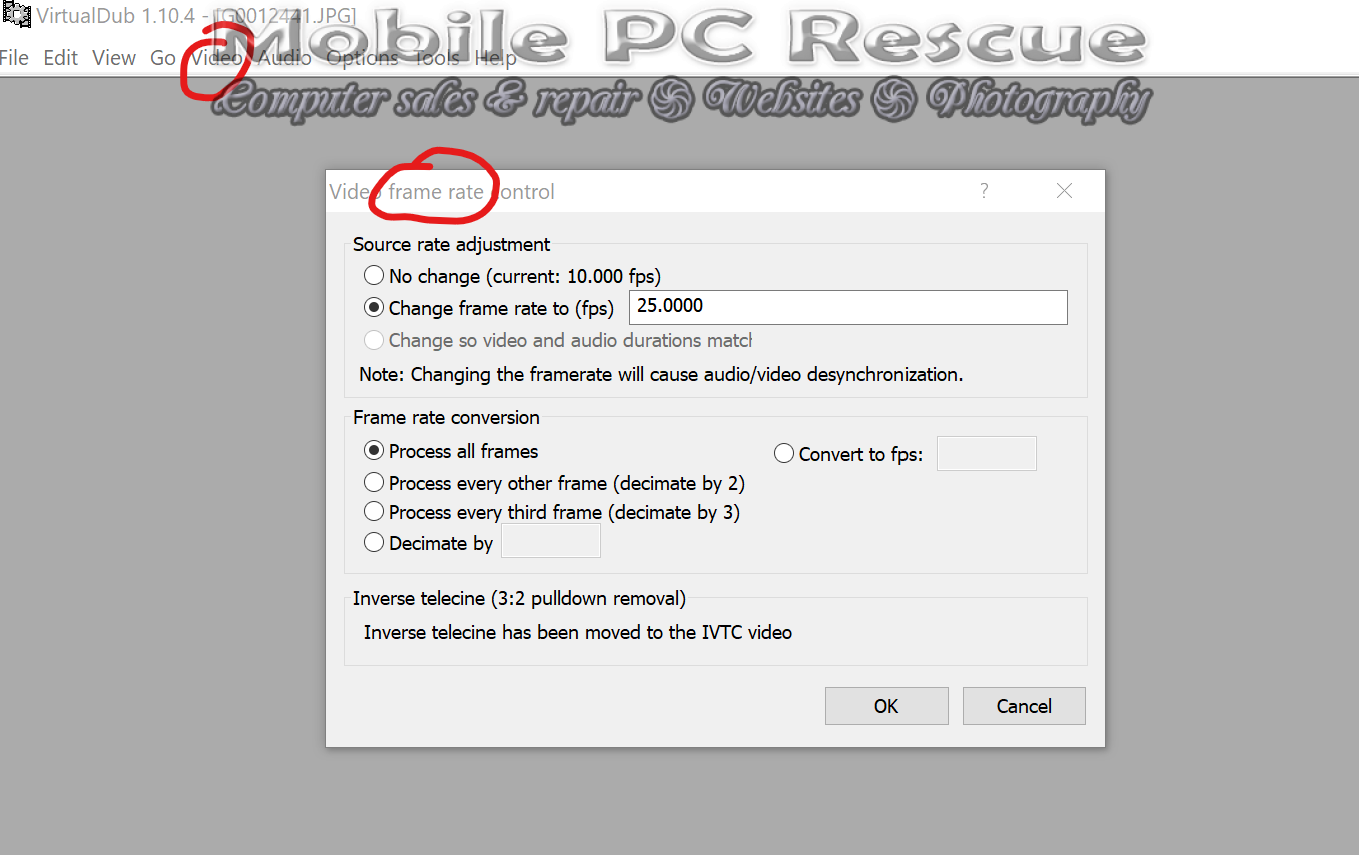
Then click Video / Frame Rate and put in 25 like this:
Now select Video / Compression, I decided to use XVID MPEG-4 Codec (the x264vfw codec gave a few seconds pause at the start of every video)
Now you can change this to suit your needs but I found that at 1.5 it gave me the best quality, a fast render and very good file sizes.
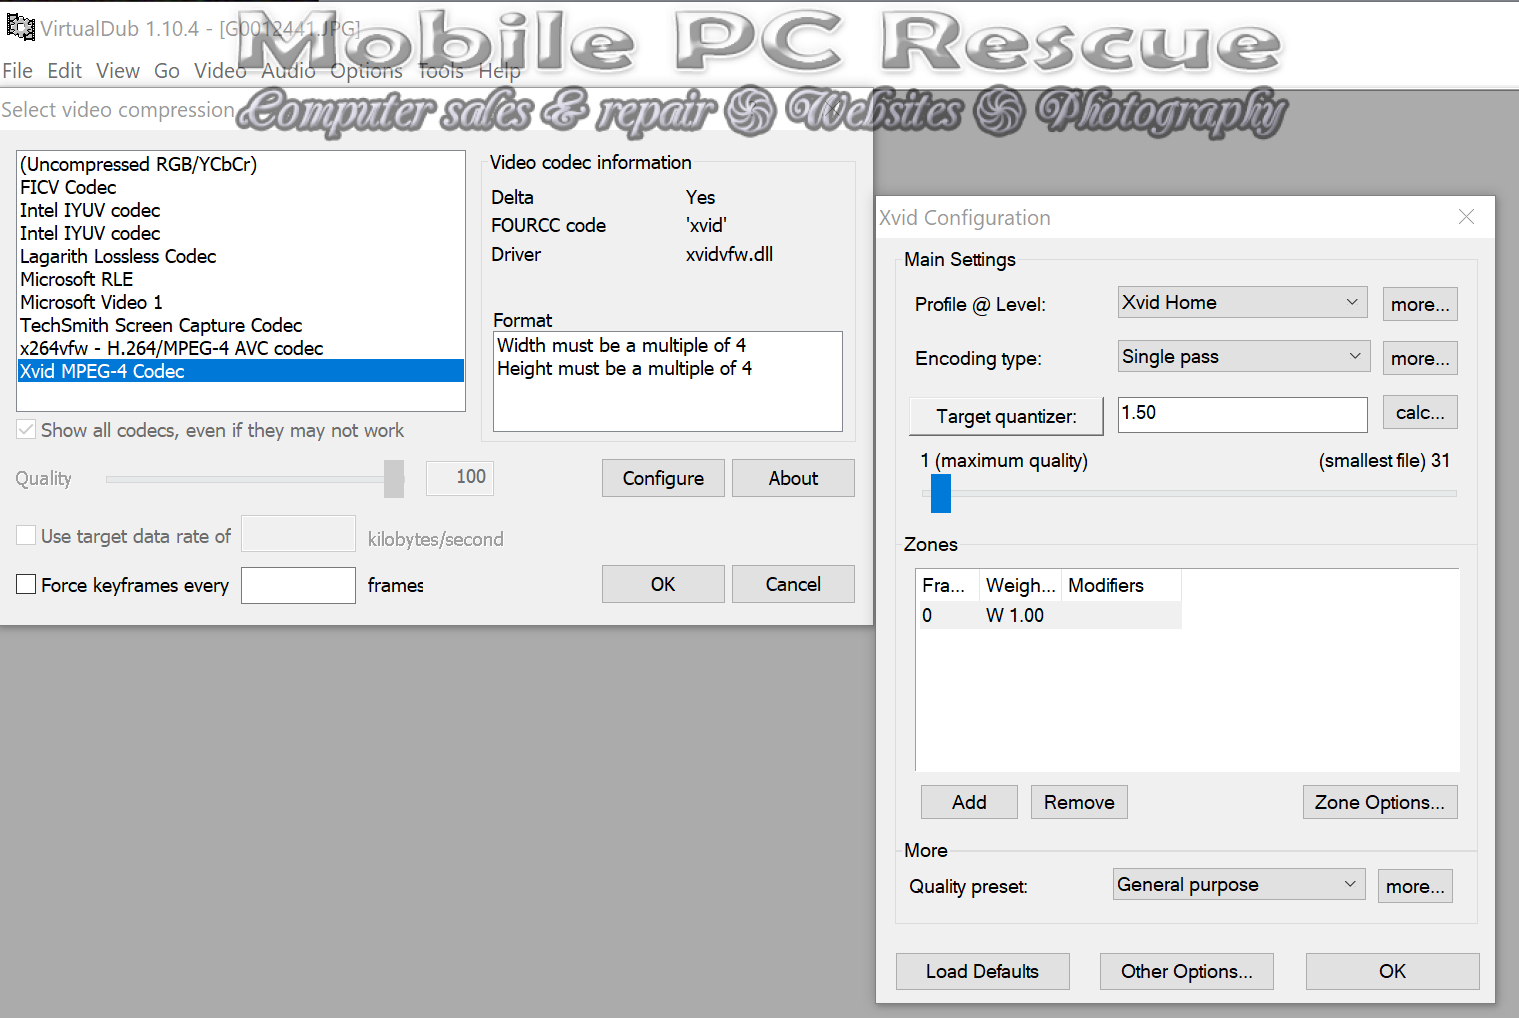
On my test file of 3.136 images, the file sizes vary from 800Mb to 6Gb, so at 1.5 on the quality, these average at 2.2 Gb which I’m happy about, and the quality on the 4K screen looks perfect.
I hope this helps some of you, please like and comment if you use this guide, thank you.
Discover more from Mobile PC Rescue
Subscribe to get the latest posts sent to your email.


